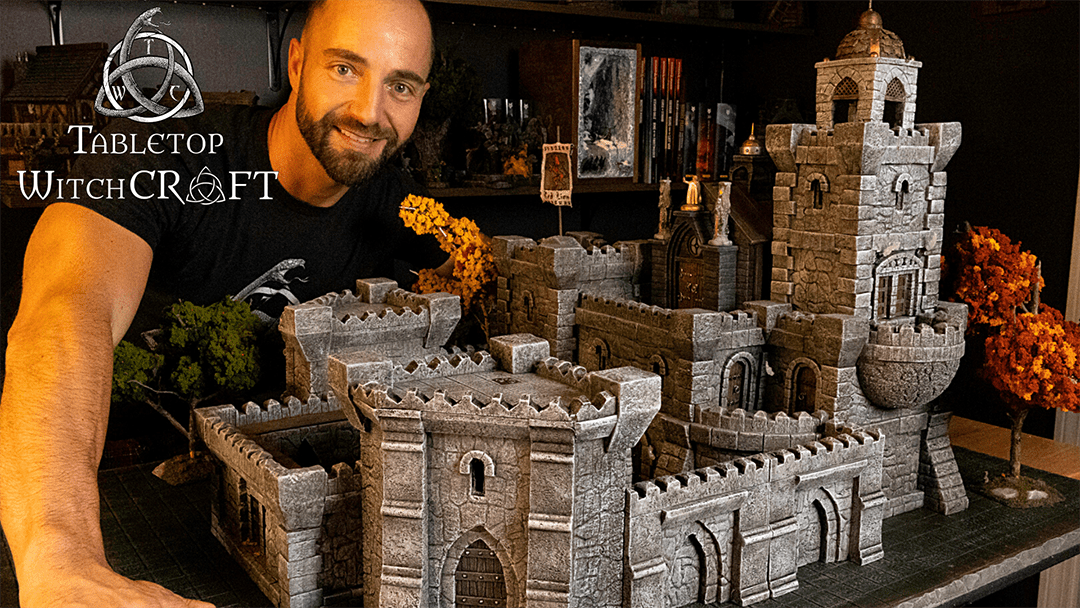
Hey there, my name is John Lombardi, and I run the YouTube channel Tabletop WitchCRAFT. My channel is all about inspiring and teaching all those that want to learn how to create a magical tabletop experience for their friends and family. I craft with all sorts of media such as XPS foam, resin, chipboard, cork, clay, 3D printed items, and so much more!
In this set of five articles, I’d like to take you on a journey through a dark and eerie dungeon lair. I’ll teach you how to create all the components to make it come to life on your game table. We’ll start out with simple dungeon tiles working our way up to creating a set piece for a final boss battle and ending in a welcoming tavern. It will be a great journey, but before I explain how to accomplish this task let me tell you a bit about my past, and where I got my inspiration for crafting at a young age.
It all started for me in the months leading up to Christmas in 1989. I became infatuated with the commercial for a game called HeroQuest. Marketed as a game of “High Adventure in a World of Magic” I was inspired by those commercials. They had the viewer roaming through the dungeon encountering all sorts of monsters and the immersion it portrayed with the doors and terrain, I knew I had to have it. After months of playing with the game it dawned on me one day that I could create little pieces of scatter terrain myself for the game and I wouldn’t be limited in my adventuring with my friends and family.
My second source of inspiration growing up was from a set of choose your own adventure books called Lone Wolf written by Joe Dever. I can’t tell you how many times I’ve read and reread those books. I loved the art, and what seemed like endless possibilities to complete each edition. These two things really fostered a love for all things fantasy and started my lifelong journey into the world of tabletop crafting and tabletop RPGs.
Crafting Your First Tabletop Terrain
Now that you know a bit about me and my past, I say it’s time we begin our journey into the depths of our new tabletop dungeon, and you begin your journey into the endless and fantastic world of tabletop crafting. As I mentioned earlier, I enjoy crafting with all sorts of different media, especially new items I’ve never used before. After all that is how we learn and improve.
We are going to start out by learning how to make some fun dungeon tiles with a few added details to really help sell the immersion to your players. Dungeon tiles are commonly made from items such as cardboard or chipboard, dollar store foam core, or XPS foam (extruded polystyrene insulation). I’m going to teach you how to create your dungeon tiles using XPS foam. In the United States it’s commonly called pink or blue insulation foam and can be found in many common home renovation stores. Depending on where you live and the climate, it comes in different thicknesses from half an inch up to two inches thick. I prefer this as my crafting medium because chipboard has no easy way of adding the texture I would want to see in a dungeon tile, and dollar store foam core is very thin and will end up not sitting flush on the table once we’re done working with it as it’s only about three sixteenths of an inch thick. In Europe there is a green version of XPS foam called Styrodur that is highly coveted as it has tremendous sculpting properties as the foam does not “bounce back” once it is depressed. Unfortunately, we can’t get this product in the United States.
Now that we have our foam picked out let’s gather up some inventory items we’ll need for our quest. This would be a good time to mention that you can visit my website for a complete list of tools and crafting supplies I always keep on hand in my studio at tabletopwichcraft.com. I have direct links to Amazon so there’s no need to head off on a side quest, and search for the following items yourself. Also as an affiliate of Amazon I earn a small commission from each sale so a small kickback will come to the channel. I thank you in advance for your support.
The first thing you’ll want to pick up is a self-healing mat. This will give you the worry-free crafting space you need. You’ll be cutting, chipping, and painting so you don’t want to ruin your dinner table when you’re done! Next pick up a sharp utility knife with a long blade. I like to use an OLFA knife. You can adjust the blade length depending on the foam thickness you’re using, and it has a very sharp replaceable blade. This is extremely important, so you don’t tear your foam. It’s amazing how fast foam can dull a blade. An X-Acto is the next blade you’ll want to make the finer cuts, and to score your board to make placing your one inch grid a breeze.
You’ll also want to pick up an 8 -inch by 12-inch carpenter square. You’ll use this to guide your OLFA knife when cutting. It’s also a good idea to wear a thick glove on your hand holding the foam down to reduce the chance of a cut if the blade slips. Trust me it hurts. A fun set of tools to have, and I highly recommend purchasing, are a set of metal tip clay sculpting tools. These are excellent to cut, chip, depress, and remove foam. I use mine way more on foam than I do on clay.
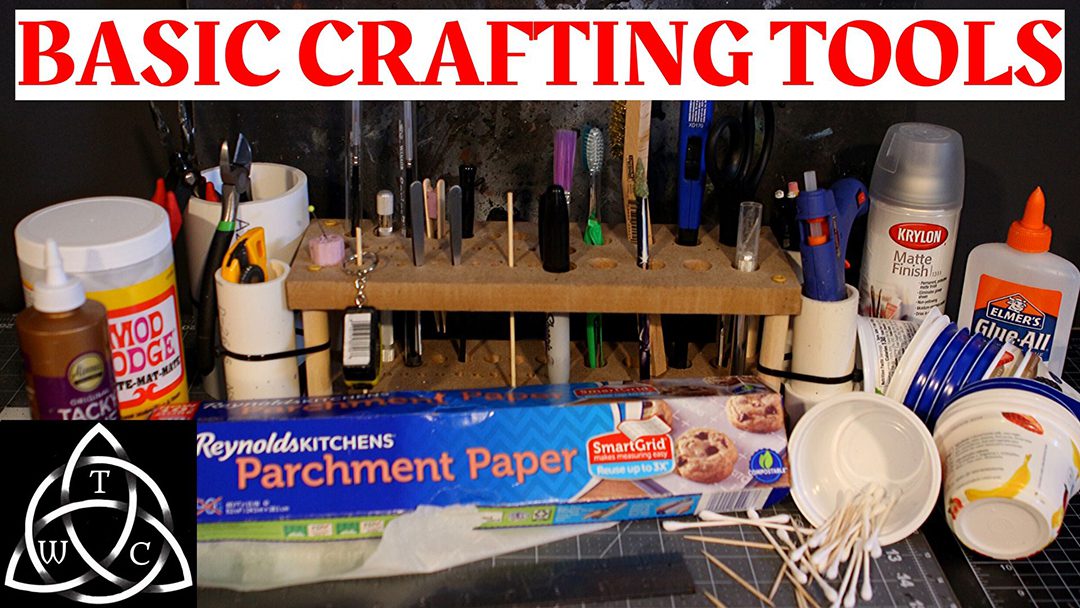
Next, you’ll want to grab a few common household items I bet you already have on hand: a pen, paint brushes, and aluminum foil. Then we are going to grab some paint (dark grey, light grey, burnt umber, and a warm white) and Mod Podge. Finally, to protect our tiles from all the carnage that will take place on them some matte medium spray. I like to use Krylon. There are more advanced magical weapons … ugh I mean tools we can use to craft and make life easier, but we’ll talk about those in later articles as they cost quite a bit more than your standard utility knife and so on. You can also check out my “Basic Crafting Tool” video on my channel.
… all a new crafter could need!
I know at first it may seem like you need a bag of holding for all these supplies, but rest assured you’ll use this basic set of tools and equipment for as long as you craft on almost all your projects.
Now to get crafting.
Sculpting an Immersive Dungeon
Some XPS foam comes with a clear removable sheet of plastic on the outside. You’ll want to remove this on both sides before you begin. This will be very important as you advance into other crafting tools such as the Proxxon Hot Wire Table, but I digress… Dungeon tiles come in any size and shape you can imagine, but the most common sizes are three inch by three inch, and six inch by six inch. I prefer making my dungeon tiles six inch by six inch as they complement my dungeon walls in a tremendous way. Once we start getting into larger tiles like a twelve inch by twelve inch, we start running the risk of tiles bending and warping due to glue and paint drying. You’re much safer making four, six by six tiles and just placing them all together.
Now time has come to make our first cut. Use your framing square, and mark points on your foam for whichever tile dimension size you choose. I’m going to assume for this and all remaining articles you chose the six by six… good choice. When you begin your cut don’t expect to make one clean pass and you’re done. When working with half inch XPS foam I make at least two to three passes with the knife before I make it all the way though. Make sure to keep the blade vertical along the edge of the metal framing square so your tiles are not only square but fit flush right up against each other.
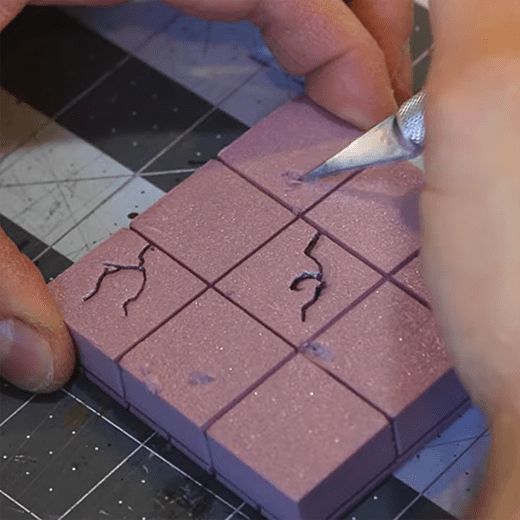
“… chip away at some corners of the grid… “
Next mark off every one inch around the perimeter of the tile, and with your X-Acto lightly score across the entire tile about an eighth inch down. You should be left with a nice grid pattern. Using your pen, you can now retrace all those lines making them more pronounced. Now we need this to look like stone so grab that aluminum foil and pull off about a foot or two and roll it into a ball. You’ll use this to roll all over the top and sides of your foam to make it look like stone! Everyone that watches my videos knows I’m a huge fan of details and layering. This is where your tiles are going to shine. Grab those clay sculpting tools, and chip away at some corners of the grid and anywhere on the face or sides of the tile.
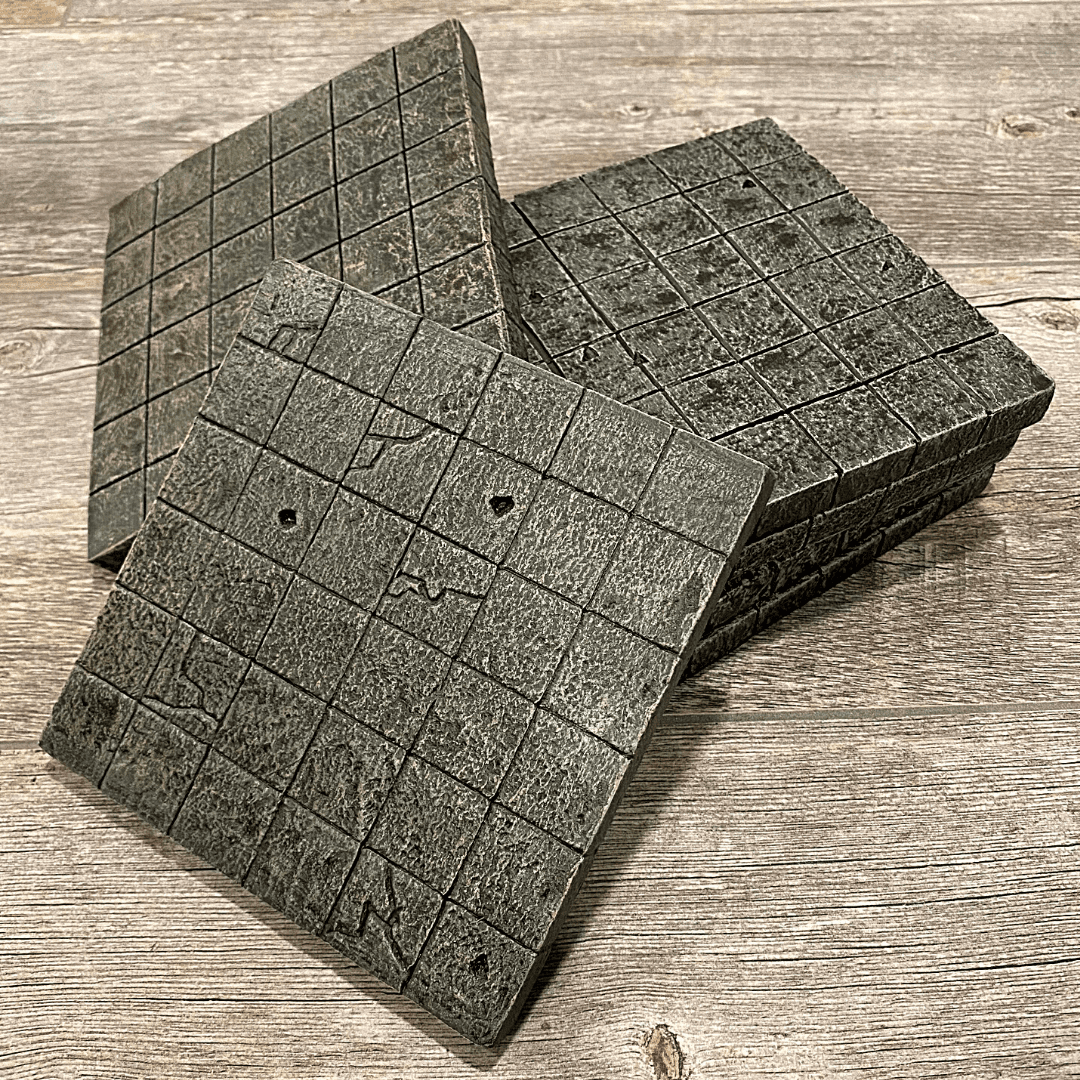
The result will look like chipped stone. You can then take your pen and etch in some cracks for a final bit of detail. Take a step back and check out your work! You’ve just made your first tile! I would say a decent number of tiles to have on hand would be sixteen and will provide all sorts of great options when playing. Check out my dungeon, cavern, and sewer tile series on the channel to see all the possibilities.
Ok now that we have our tiles made it’s time to slap on some paint. The first thing we’re going to want to do is grab our Mod Podge and add some black paint to this mixture. The Mod Podge will add a bit of a protective shell to the foam, and the black paint will serve as a nice base coat for the tiles. Once that dries (you can use a hair dryer to speed things up) place some dark grey paint over the entire tile and while it’s still wet blotch on some brown to vary up the color.
Next, you’ll want to use a different, dry, brush for the next layer. Take your light grey and add some paint to your brush (a makeup brush with a fluffy tip is best here). Wipe off most of the excess on a piece of paper towel and lightly brush over the entire tile. The paint will only hit the edges and details you added with the foil and chipping. Then do the same with your warm white VERY lightly.
Once this has dried, completely mix some black paint and water to create a black wash. Adding a drop or two of dish soap can help the wash flow into all the nooks and crannies. You can buy these premade and if you have the money I’d recommend doing so. Paint this wash over the entire tile, and let it dry for twenty-four hours. The next day you can come back and with your light grey or warm white do one final dry brush over the tile to bring out all the highlights.
Finally take your Krylon Matte Varnish and spray your tile from about one foot away VERY lightly. This will add a small layer of protection to your craft while playing. Don’t let it puddle up or it will start to melt all your hard work… literally. Congratulations you’ve just completed your first craft, and level up to a Level 2 crafter. You now have an amazing immersive dungeon tile to play on for years to come.
Immersive dungeon tiles for your adventures!
Levelling Up Further
In the next article we’ll dive into the many different options we have for creating walls for our dungeon tiles. It will vary depending on the size tile you made, and I’ll dive deeper into walls based on the six by six dungeon tiles as recommended.
As we progress in our journey, we’ll dive into all sorts of crafting media, and you’ll see how you’re only limited by your imagination when it comes to crafting. I’d recommend picking up a decent large piece of Tupperware to store your tiles and crafts unless you have space on shelves or a dedicated gaming room. I know it’s easy to get a bit overwhelmed at times with all the different supplies, crafts, and even trying to meet your own expectations. What I tell everyone is it doesn’t matter how the craft turns out if you learned something. Failure is a great way to learn and it does happen at times in this hobby. That’s ok. Be proud of the time and effort you put into that piece, and look forward to your next great adventure.
For more great crafting inspiration and content please visit me on YouTube or visit my website that has links to the most common items I use, links to all my plans and merchandise, as well as discounts for all my affiliates. Ok, until next time I’ll see you around!
![Grim Hollow: The Player's Guide [PDF]](https://b2358178.smushcdn.com/2358178/wp-content/uploads/2021/02/Grim-Hollow-players-Guide-PDF-600x600.jpg?lossy=1&strip=1&webp=1)


0 Comments